
Hello everybody! I will shut down this site soon as all content has been moved to
Liquid thermal paste in laptop
TL;DR: Don’t use it in portable things as it cracks
My laptop has become loud and slow over the years. This came from permanent 90°C CPU temperature and thermal throttling.
From my experience, the manufacturer never uses the correct of thermal paste, so I opened my laptop up and applied Coollaboratory liquid pro thermal paste.
This stuff is much better than the usual thermal paste. It’s actually metal (indium? germanium?). It also diffuses into the copper which makes a very strong bond.
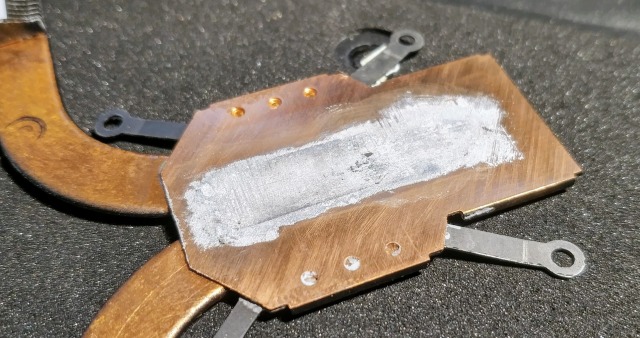
CPU cooler with crystallized liquid thermal paste. Source: mine
Posted in Uncategorized
Leave a comment
Learning a sine wave with LSTMs
TL;DR: Copy & paste the linked code to have working Neural Network as a starting point for your application
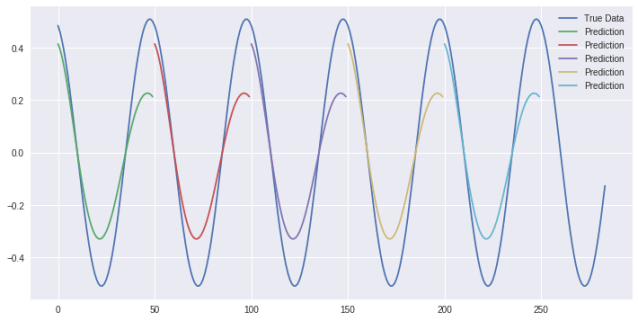
50 consecutive prediction steps on a sine wave. Source: mine
Introduction
I tried several times to get started with Deep Learning. But pretty much all the tutorials were outdated and it was just a lot of work with no result in the end.
This time I invested my time into learning a sine wave. And it actually works! I’ve published the Jupyter Notebook on Colaboratory which you can just copy and get started within 5 minutes.
Posted in deep learning
Leave a comment
Deep learning made easy with Colaboratory
TL;DR: Get free a GPU and environment with Jupyter Notebook with this tutorial
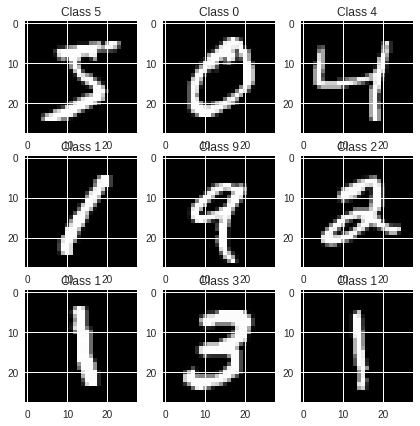
MNIST dataset picture from the tutorial
I always struggle to set up the environment for deep learning frameworks. It seems you need the right set and versions of hardware, OS, drivers,framework. And if you want GPU support, things get even worse.
But google wants you to use their google cloud platform. They even give you the first shot for free a free server including Linux, ssh and static ip.
And google is one of the leading companies in Deep learning. They combined both with Colaboratory. You get:
- Tesla K80 GPU shared instance for up to 12h / day
- complete software environment with Jupyter Notebook
- linked to google drive so you can share with
your friendsother people - you can access the base operating system easily and install other software like opencv
Someone else invested a lot of time and work to explain this. Follow fuat’s tutorial here.
Out of memory errors
Well, this is free, so you only get the ‘free’ resources. You can check how much with this snippet
# memory footprint support libraries/code
!ln -sf /opt/bin/nvidia-smi /usr/bin/nvidia-smi
!pip install gputil
!pip install psutil
!pip install humanize
import psutil
import humanize
import os
import GPUtil as GPU
GPUs = GPU.getGPUs()
# XXX: only one GPU on Colab and isn’t guaranteed
gpu = GPUs[0]
def printm():
 process = psutil.Process(os.getpid())
 print("Gen RAM Free: " + humanize.naturalsize( psutil.virtual_memory().available ), " I Proc size: " + humanize.naturalsize( process.memory_info().rss))
 print("GPU RAM Free: {0:.0f}MB | Used: {1:.0f}MB | Util {2:3.0f}% | Total {3:.0f}MB".format(gpu.memoryFree, gpu.memoryUsed, gpu.memoryUtil*100, gpu.memoryTotal))
printm()
The good output should look like this:
Requirement already satisfied: gputil in /usr/local/lib/python3.6/dist-packages (1.3.0)
Requirement already satisfied: numpy in /usr/local/lib/python3.6/dist-packages (from gputil) (1.14.3)
Requirement already satisfied: psutil in /usr/local/lib/python3.6/dist-packages (5.4.5)
Requirement already satisfied: humanize in /usr/local/lib/python3.6/dist-packages (0.5.1)
Gen RAM Free: 12.6 GB I Proc size: 308.3 MB
GPU RAM Free: 11438MB | Used: 1MB | Util 0% | Total 11439MB
If it is not enough you should kill your instance and reconnect. Make sure you comment this line again after execution!
# !kill -9 -1
Posted in deep learning, linux
1 Comment
Connect Batteries easily
TL;DR: Use magnets to connect batteries
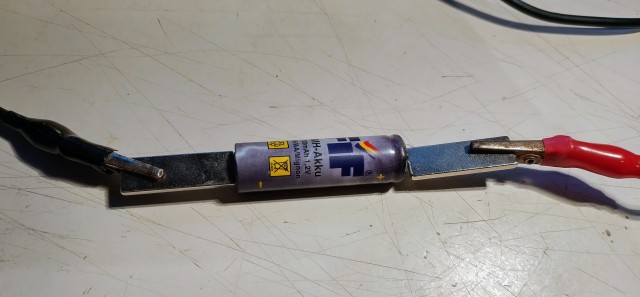
Most Batteries contain Iron or Nickel. Just use a magnet to connect the battery. On the other side you can use one of those cheap copper-clad cables from china or alligator clips
Bonus: The magnets automatically disconnect if they reach ~90°C in case of a short circuit.
Posted in Uncategorized
2 Comments
Fixing a chinese 3D Printer: Part 2
TL;DR: I’ve invested way too much time and money in this thing
Introduction
I’ve printed for over a month now. Various things broke and some improvements weren’t improvements after all.
New bed surface
I’ve tried a lot. The best is borosilicate glass. It just works and the bottom is sooo smooth.
This here is a ipad screen protector. It turns out that you can’t cut tempered glass with a box cutter.
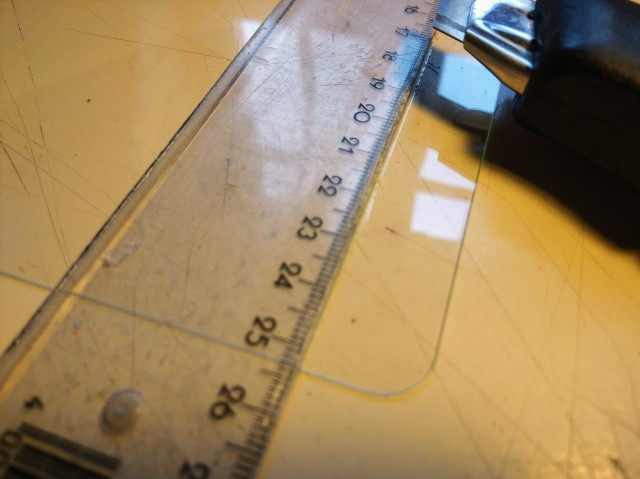
But I managed to keep it in one piece as the bottom side is made of polycarbonate.
Posted in Uncategorized
Leave a comment
Fixing a chinese 3D Printer: Part 1
TL;DR: You have a lot of work to do until this is usable
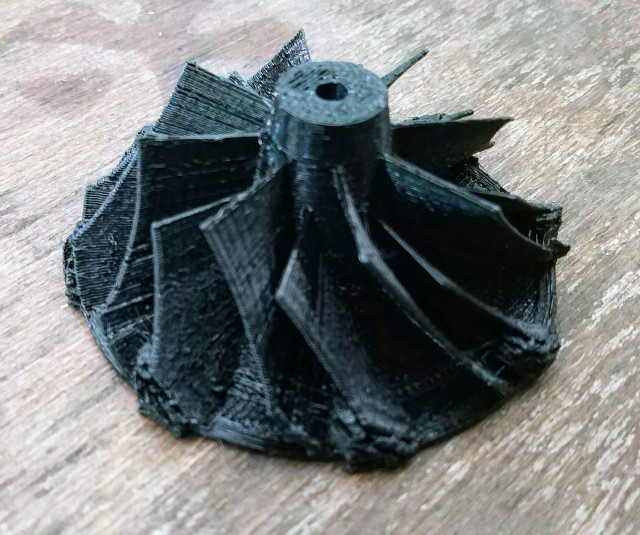
photo of a random print at 120mm/s
Introduction
I’ve bought an Anet A8 für 143€, everything included. It’s a clone of the the Prusa i3 and available under all kinds of brandings and with every changing components. Here are the things I’ve learned on my way.
Common Errors which have to be fixed
Posted in Uncategorized
Leave a comment
Lowside current measuring gone wrong
TL;DR: Always take into account the ground bounce.
Introduction
I’m developing a software controlled Switched Mode Power Supply (SMPS). For this I need to measure current at ~250kHz. This is a recollection of the false assumptions and mistakes I made.
The circuit
I’ve decided to measure the current lowside as it seemed easier when I stared. And lucky me, this problem has been solved countless times before and the ideas collected in the application note AN105 by LT.
My circuit is basically this:

Figure 26: “Classic” Precision Low Side Current Sense. Source: AN105 by LT
Posted in Uncategorized
Leave a comment
Earn money with your smartphone
TLDR; Let your smartphone mine cryptocurrencies
I like money. Money is even better if you don’t have to work for it. So I set up my smartphone as a zcash node. Zcash is similar to bitcoins: You exchange computing power for virtual money.
This post is twofold: First the hardware modification to keep the CPU cool, second a rough sketch of the software.
Hardware
I’m using my old phone. This is a LG G3 D855. The used CPU is a quad core with 4 x 2.5GHz Qualcomm MSM8974AC Snapdragon 801.
Unfortunately, LG messed up. Here is a picture of the CPU:
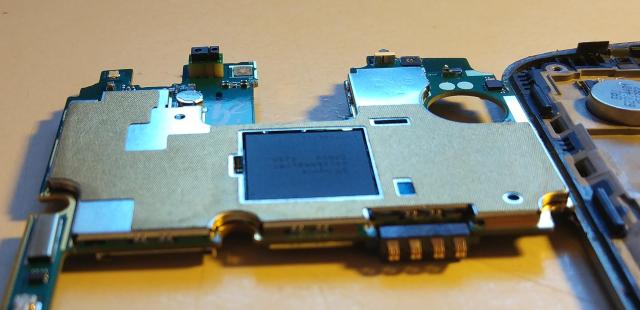
You can see that the CPU is recessed a bit. There is a corresponding recession on the phone’s display side. But there shouldn’t be a recession, it should be slightly elevated to contact the CPU!
Posted in embedded, linux
Leave a comment
